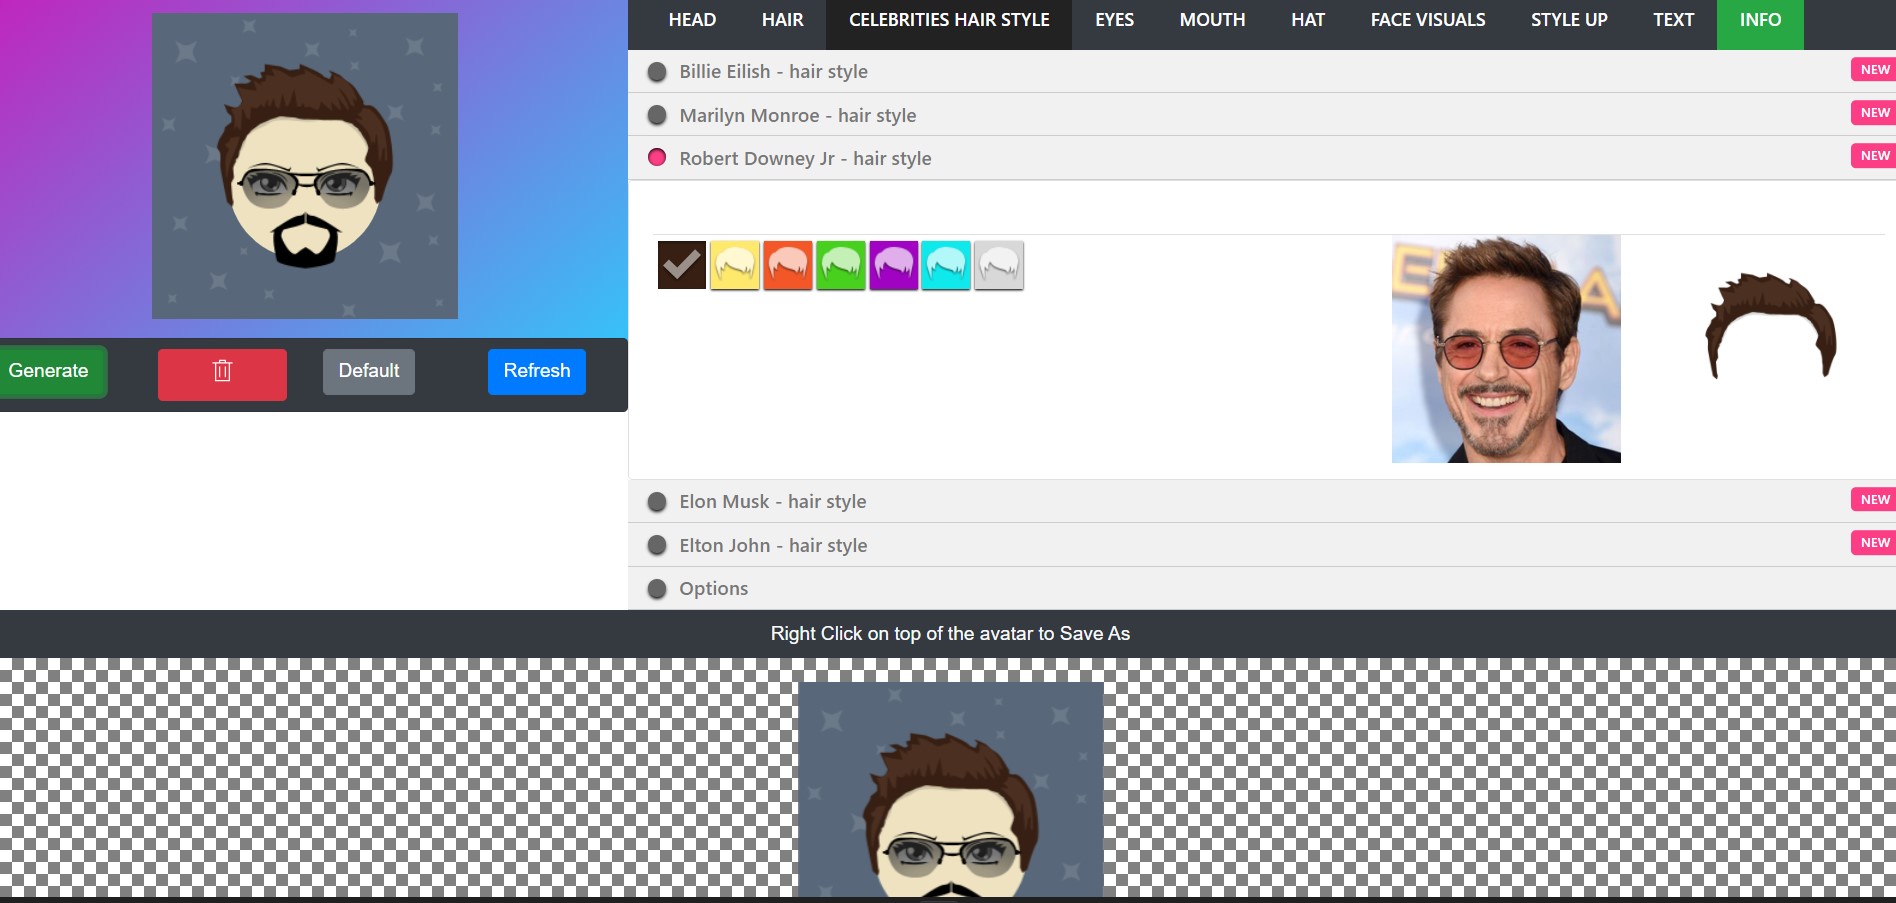
The (web) Avatar Generator app allows members (registered user) on this platform to create an unlimited number of PNG images.
These generated images (avatars) can be added as a profile picture on the My Profile page, on other platforms or social networks. The generated avatar image has a fixed size of 255px long by 255px wide.

UI – User Interface
The visual generator is displayed on the left and the options panel on the right.
The left window contains HTML blocks that visually make up the avatar.
Each item finds its editing options in the right pane.
For example, the visual element HEAD. In the right panel, click from the Horizontal Bar, the Head tab (button) that allows you to choose between the shape of the Round or Oval head shape but also the color from the default options.
Hair options. Select this tab from the horizontal bar to display the options for the HAIR element. Change the hairstyle of your avatar as you wish. Choose from 6available hairstyles with different hair colors.
Click on Options to move the selected item up or down. The x button removes this visual element.
Similar functions can be found in the Celebrity Hairstyle section. More colors, the same hairstyle and the option of positioning or removing the selected element.
Change the Eye, Glasses, or Mask items. Choose from 53 available options. Combinations between eyes and glasses or eyes and mask are also possible.
Options for moving or removing items are displayed individually for Eyes and separately for Glasses. Use Opacity option for Eye element to make the eyes of the avatar semi-transparent (full transparent or full opaque)
Edit visual element Mouth. Navigate to the MOUTH section of the horizontal bar.
Choose a style from the existing ones. The option to move the mouth element up or down and also to remove this element is added a section-below, in the same editing area.
Add (or not) head accessories by selecting the HAT tab from horizontal navigation bar. Select one of the 11 existing items.
Options, move or remove visual element. In addition, you can use the mouse to drag / move accessories into the avatar space.
Optionally, add visual effects to the face, select the FACE VISUALS from top-right horizontal bar.
Options to move the item left or right, up or down. x removes the item.
The STYLE UP tab/button displayed in the horizontal bar (Options Panel) contains the option to add / use background color to your avatar (using color picker), background graphics, a combination of the two of them or neither.
TEXT. Access this area in the Options Panel to add text.
Existing options: display or not text, change color, change font, change font size, letter spacing, text opacity, reposition up/down.
Buttons
Below the top-left preview window where all graphic elements and blocks show up the visual design of the avatar, there are a few buttons. Each button does a “thing” so, here’s what “those buttons do” :
- Generate – as the name of the button suggests, on click, generates the PNG image of the Avatar.
- Trash icon (Remove) button, appears only when an avatar is generated and does exactly what the icon suggests, on click, removes any/all generated avatar(s)
- Default button. Reverts all editing to Default avatar state.
- Refresh button, reloads the web-app page
To save a generated avatar simply click on Generate button and after it is displayed in the area below, right click on top of the image and Save As…
Right click on the generated avatar to save it as a PNG image on your laptop or PC
If you have other questions, suggestions of feedback, feel free to visit the support forum.